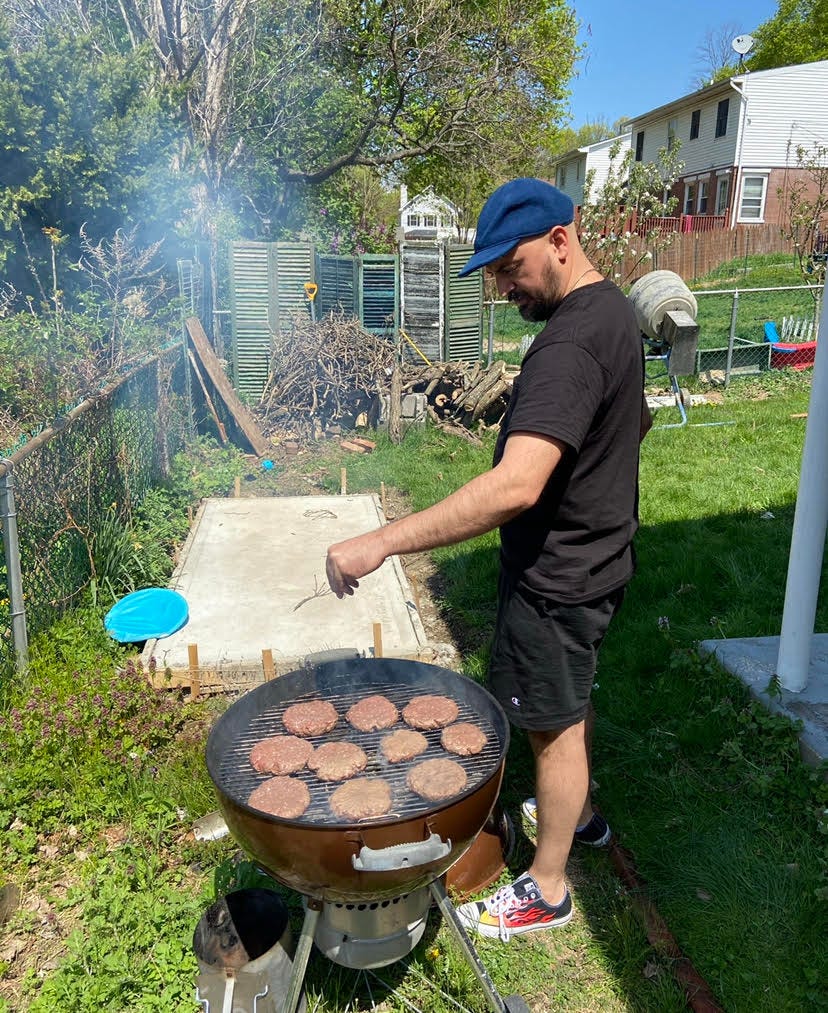
I’ve wanted to build a simple wood-fire grill for my entire adult life. I learned how to grill on one at my father’s house in Mexico while I was living there around the age of fifteen. It comprised a long beige-tiled counter with built-in Argentine-style grill grates that you could raise and lower over the fire with a hand crank. My father and I shared Carta Blanca beers while grilling chuletas de filete (filet mignon) almost every weekend that year.
These grills are common throughout Latin America and the Mediterranean, but I couldn’t find helpful YouTube tutorials until I typed in the word “Uruguayan.” Judging by the results, I would bet that Uruguayans have the most wood-fired grills, or parrillas, per capita.
Traditional Uruguayan parrillas are enclosed, with a slanted roof and a chimney. I watched about a dozen videos on how to make them, but I decided to stop short of building the chimney section. I built it in a way that will make it easy to build up later if I find it necessary. What I did is extremely simple, by comparison, but it will still leave you with a sore back.
Here are my guidelines.
Preparations for the slab
You’ll need to pour a concrete slab. You should watch YouTube videos on this, but I’ll give the basic instructions here.
Mark off an area a few inches larger than you expect your grill to be on all sides with a string. My grill is 3’3” x 7’3” and the slab is 3’9” by 7’6.”
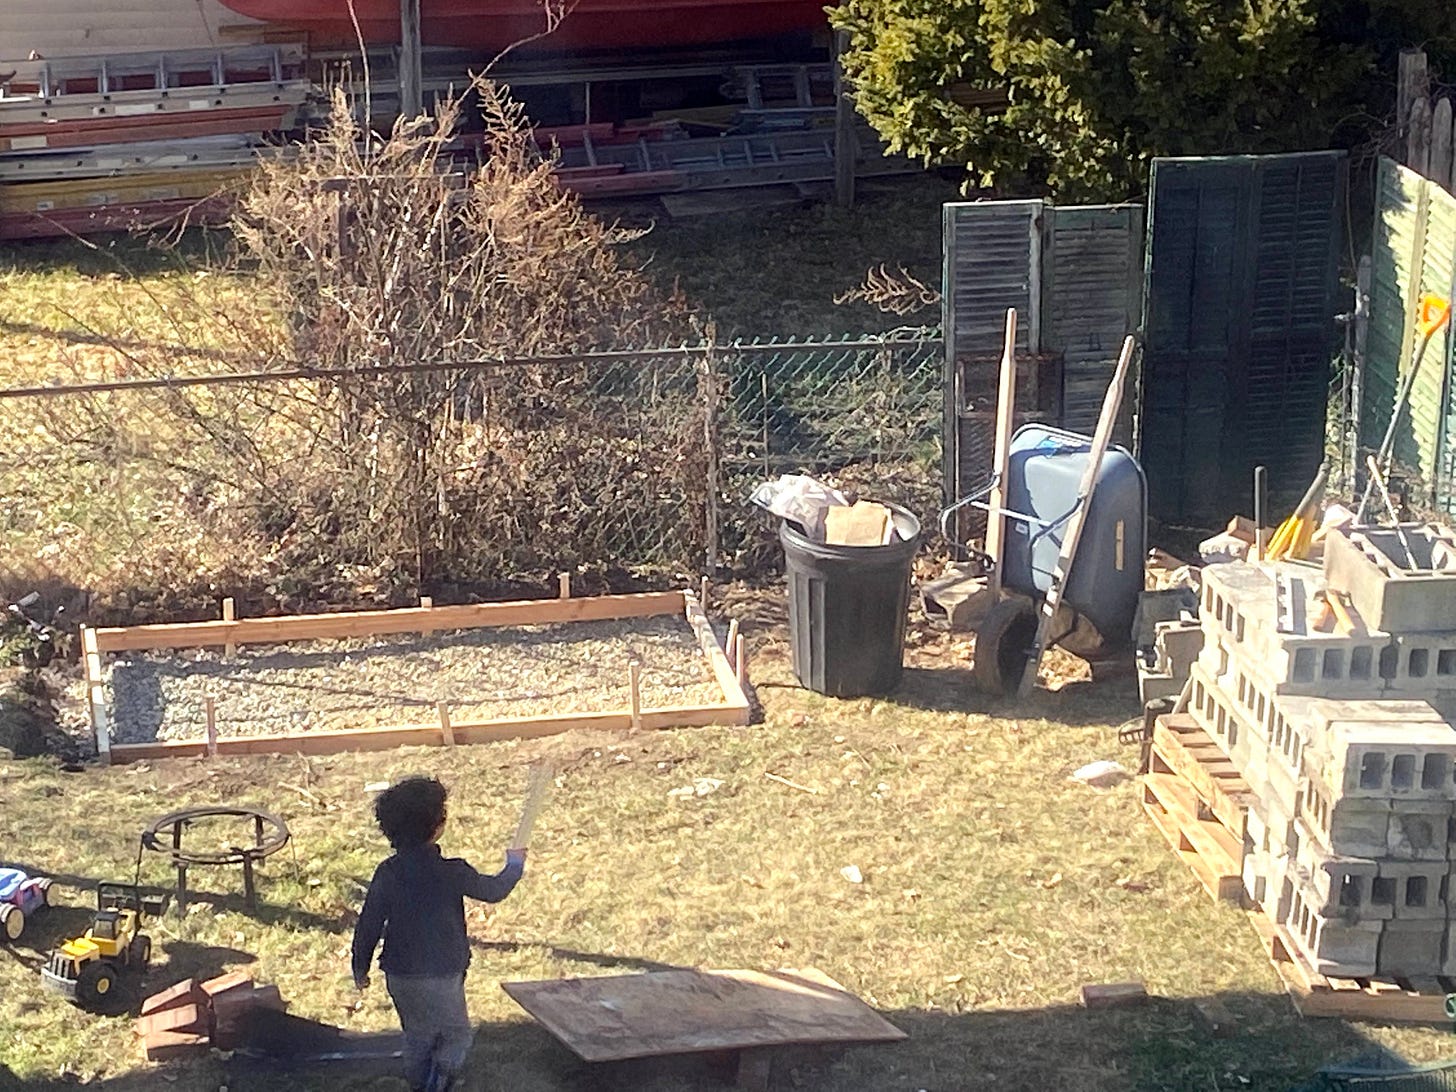
Dig out the area of your slab. You need to go about 4 inches deep and then level out the dirt with the backside of a hard rake and a tamp.
Build a frame using 2 x 4 s. The interior of the frame will be the size of your slab. Cut the 2 x 4s and then nail (don’t screw) them together.
Place the frame in the hole and square it by measuring the distance between the corners in an X pattern. The length of each line of the X should be the same.
Make or buy stakes that are about 2” x 2” x 1’ and pointed on one end. I cut mine from scrap wood. How many you need depends on the size of your slab.
Nail the stakes into the outside of the frame, along every few inches of the 2x4s leaving 2 or 3 inches of the pointed end of the stake sticking out below the 2x4 and the flat end of the stakes sticking out above it.
Nail the frame into the ground by hammering the tops of the stakes. As it gets deeper, use a long carpenter’s level on several spots along the tops of the 2x4s to ensure the whole frame is level. Continue tapping it here and there with the hammer until it is perfectly level on all sides. This is crucial.
Pour a 1” thick layer of crushed stone across the base and tamp it down rigorously with a handheld tamper. You can ensure the base is level several ways, but I just used a long carpenters’ level in several spots.
Pouring the slab
You’ll need to mix a lot of cement quickly and pour it into the hole. You can do this in a wheelbarrow with a hoe, but I advise against pouring the slab until you borrow or rent a mixer. Once you start pouring you must finish, or it could dry out. For that same reason, buy more bags of cement mix than you think you need. You can’t stop to run to the store for more mix halfway through pouring. There is an online calculator that can help you determine approximately how much you need, but it turned up short for me in a crucial moment.
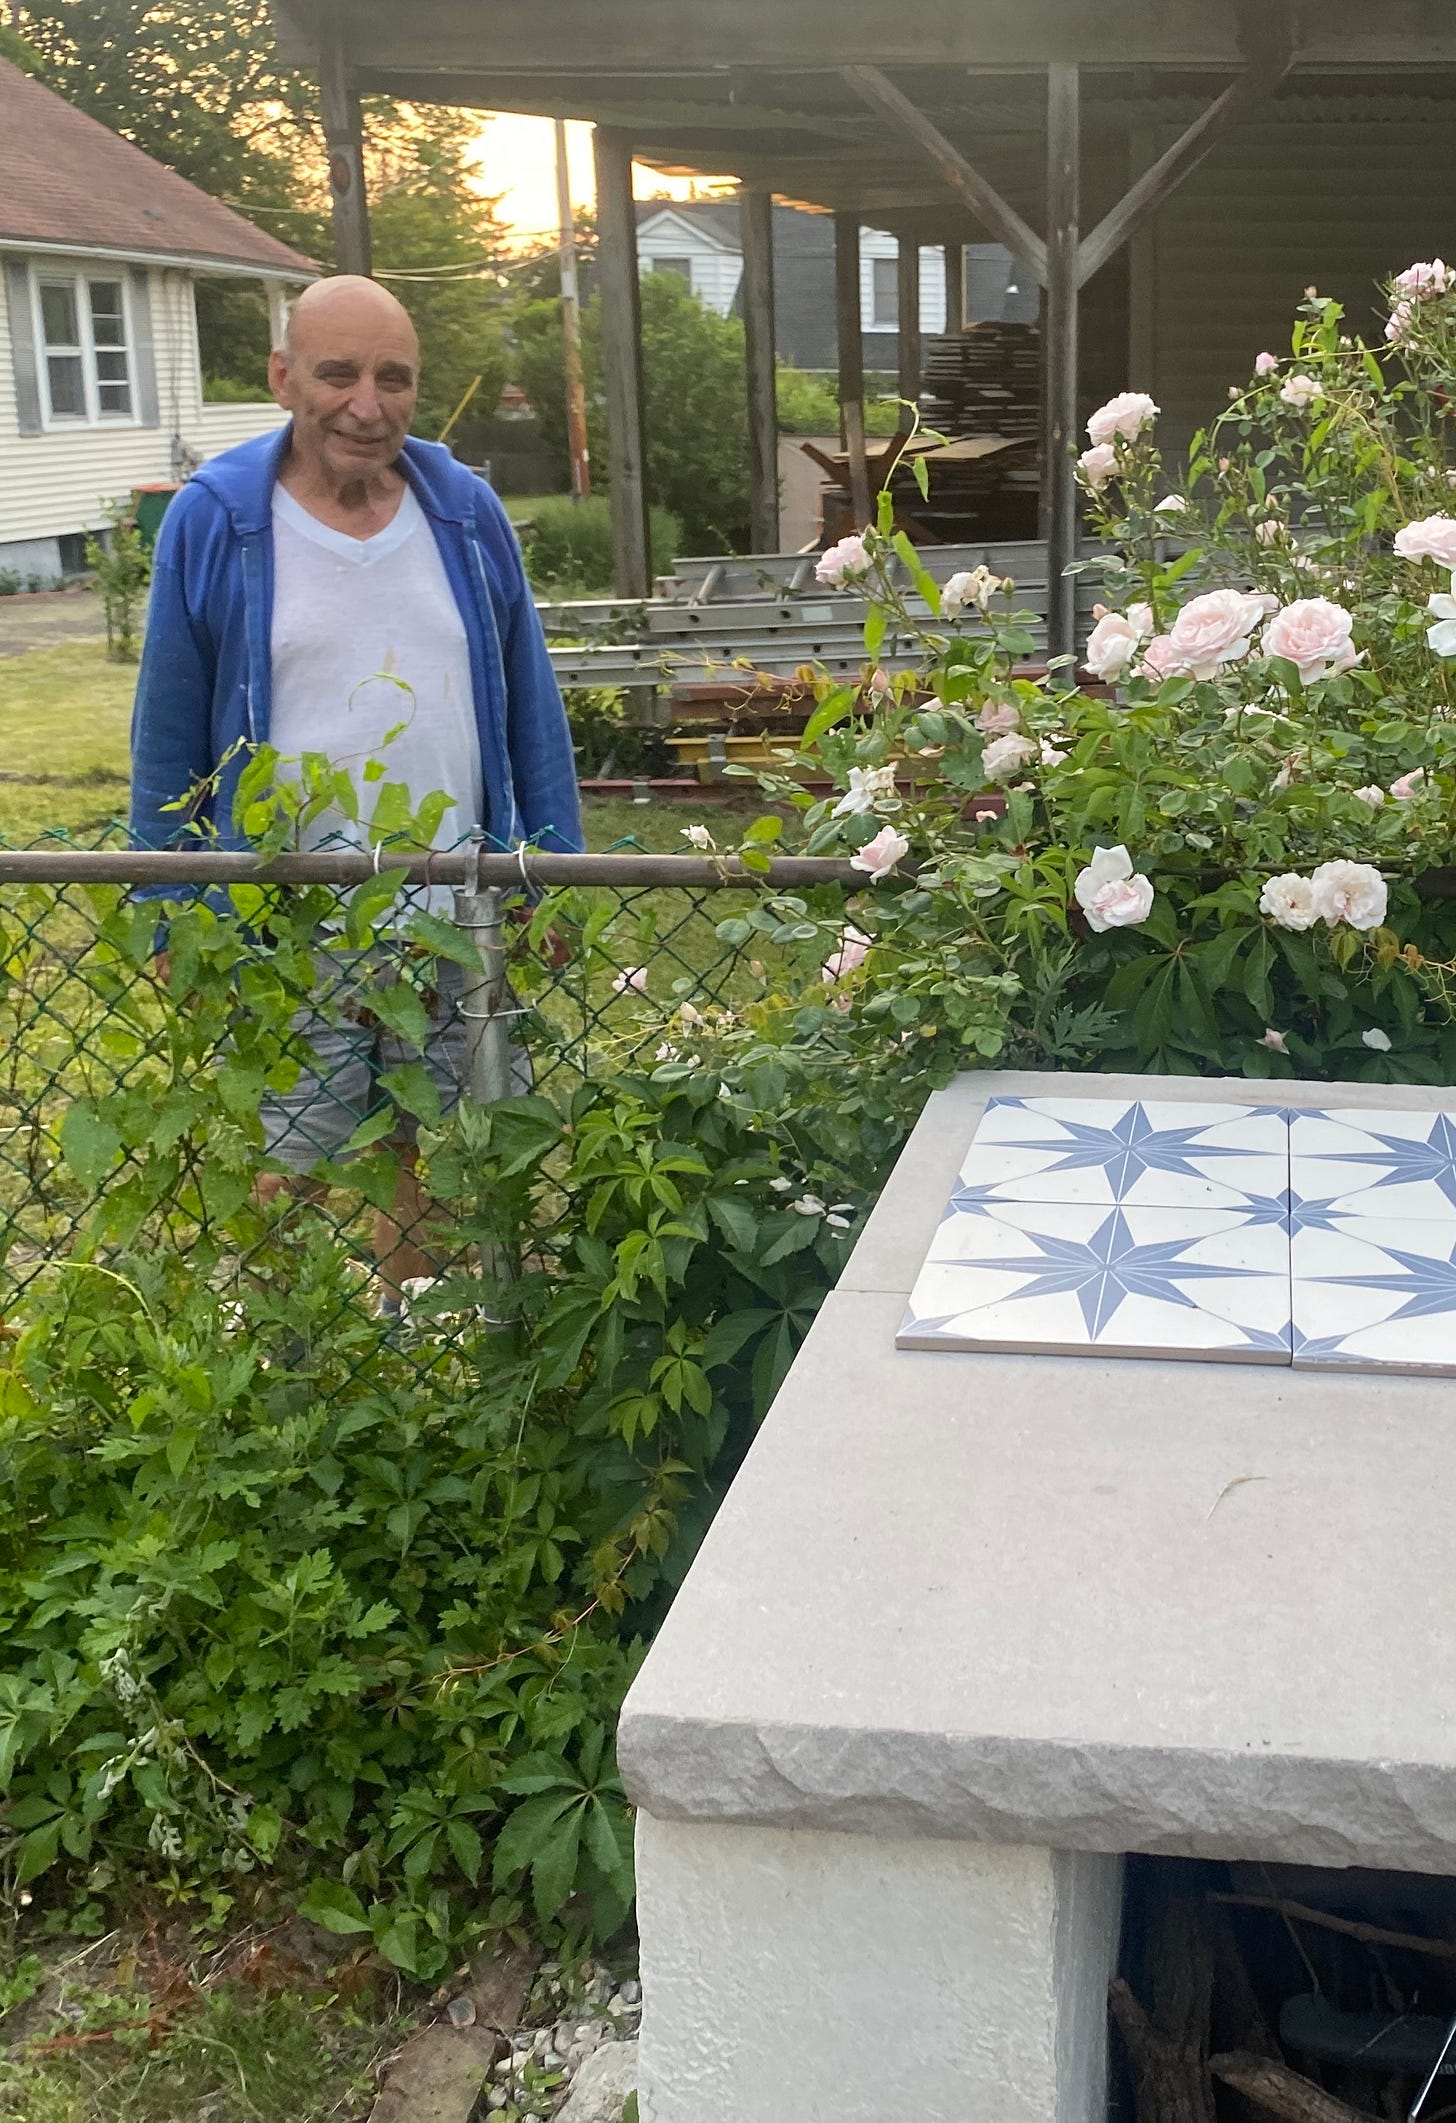
Luckily, a grisly retired carpenter in his late 80s who lives on the other side of my chain-link fence climbed over with an 80-pound bag of cement slung over his shoulder when he saw that I was in distress. He also lent me his cement mixer and advised me to supplement the cement with stones and bricks to cut costs.
Add wire mesh designed for concrete slabs into the frame. Prop the mesh up with stones. You want it to sit in the middle of the width of the slab to increase the slab’s strength.
Place stones between the mesh’s wires—don’t use anything that will stick out above the upper edge of the frame.
Position the cement mixer near the hole.
Add one bag of cement to the mixer at a time, turn it on, and then spray water into the mixer tub with a hose until the mix becomes slightly soupy—not so thick that it doesn’t pour easily, and not so wet that the water will pool. Pour it into the hole and even it out with a shovel.
Continue doing this until the hole is filled.
Take a 2 x 4 that is a foot or two longer than the width of the frame, and lay it across the end of the frame. Starting at one end, slide it back and forth over the cement in a sawing motion, moving it slowly toward the other end, to smooth out the surface of the slab.
Let the cement form slightly, but while it is still moist use a large trowel to sweep the surface of the slab in large half circles to smooth out any imperfections.
Use an edge tool to create a nice, curved edge around the slab.
At this point, the slab needs to cure for a few weeks. Don’t let it dry out too quickly or it will crack and don’t let it get soaked in the rain (cover it with a tarp if needed). It must stay moist but not wet for the first several days.
Once it has cured, remove the frame by tapping the stakes out with a hammer.
Stacking the base
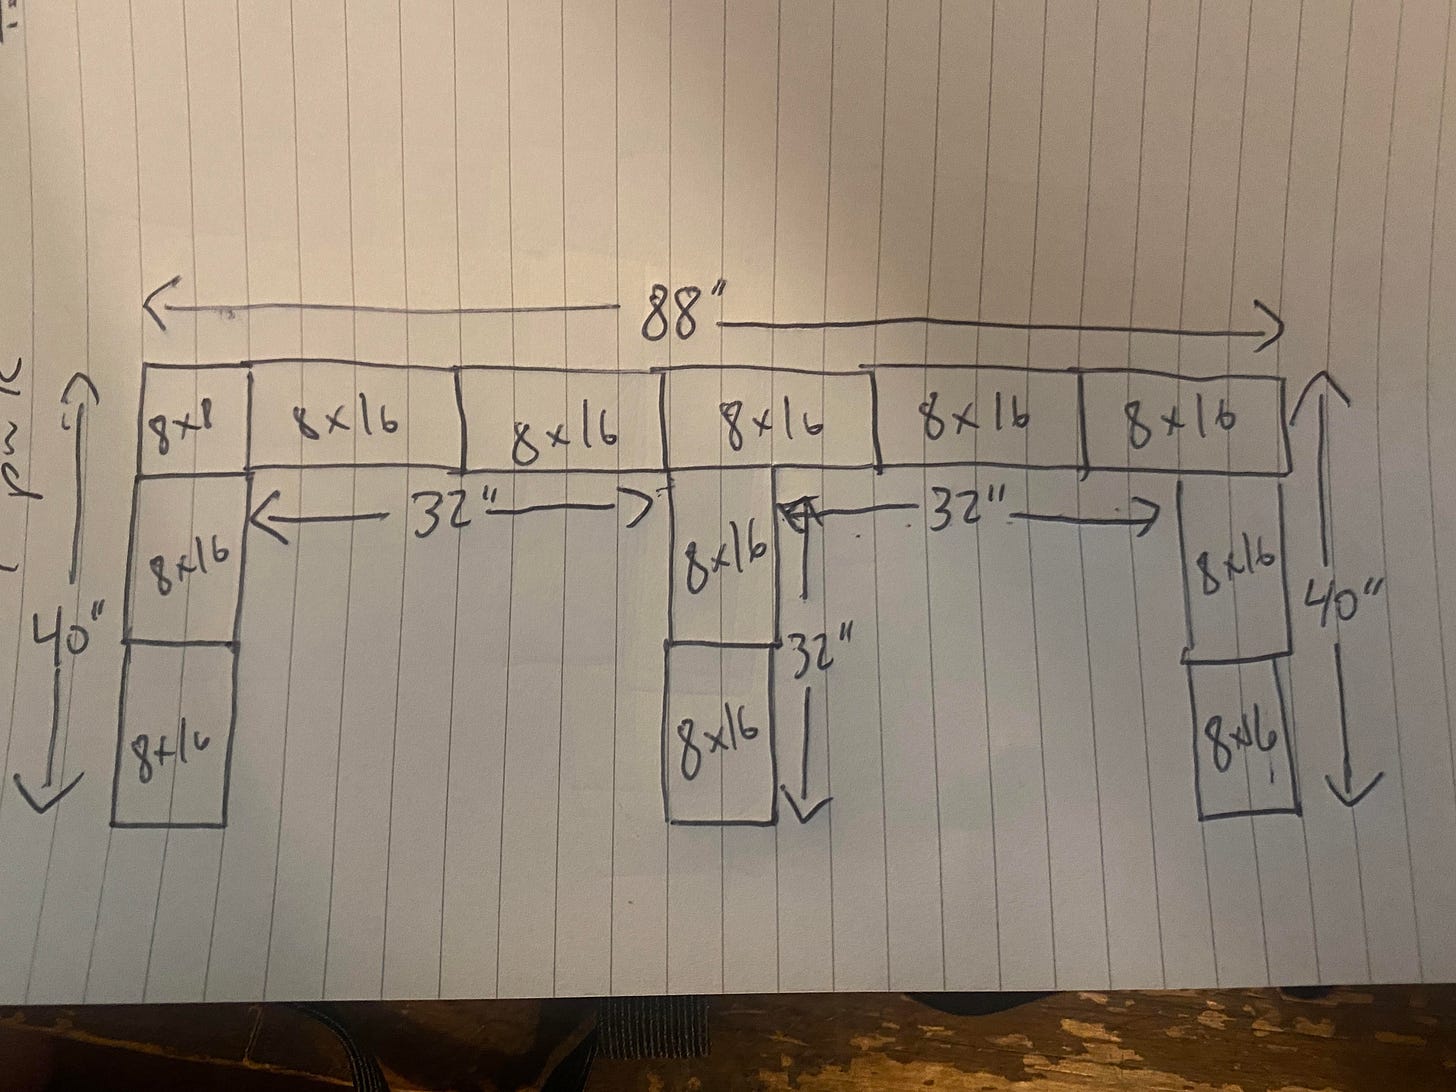
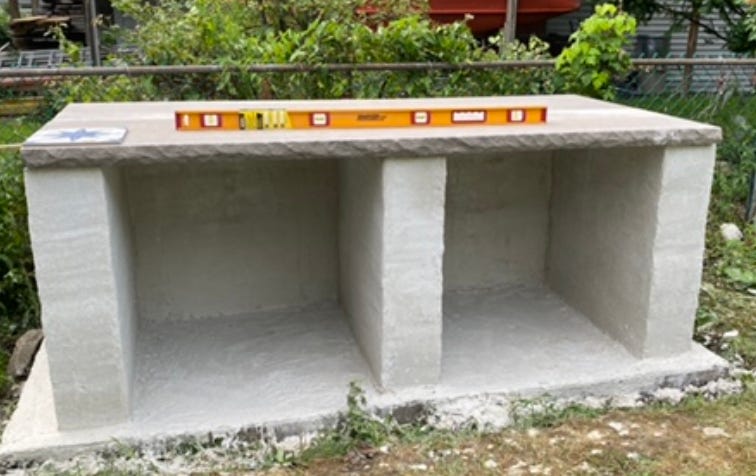
For my base, I used standard 8” x 8” x 16” inch and 8” x 8 x 8” inch cement blocks. You can get creative with your design or make a symmetrical design with two openings for wood or other storage like I did.
Here are the measurements for my grill:
I stacked mine 4 levels high, which is great for my height (6’). If you are shorter, you could stack three layers of regular 8” tall cinderblock and the fourth layer with 4”. Remember, the grill itself will have some height as well. When stacking the blocks, I mortared each level, filled with stones, mixed and poured cement in the holes, and then added a layer of a product I found called Quickwall from the company Quickcrete to all surfaces. It’s a surface bonder like Portland Cement with fibers in it, designed so that you don’t need to mortar or fill. Also, it looks like a textured stucco, and you apply it like you would stucco. If I were to do this again, I wouldn’t bother with the mortar or filling. I’d just mortar the first layer, dry stack the rest, and then coat all sides with Quickwall. Since I did all three—mortar, filling and Quickwall—I have solid concrete walls that could survive a bad earthquake.
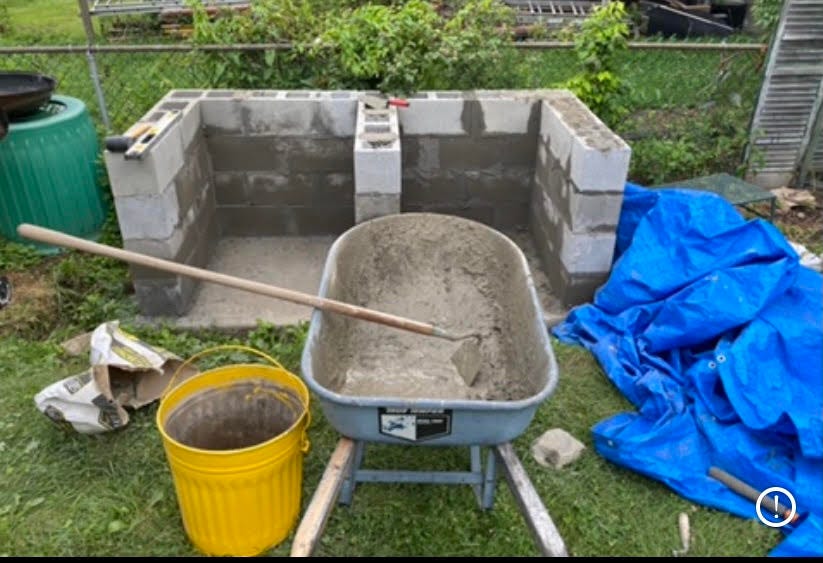
Lay your first layer of cement blocks in your desired pattern and measure between all corners to make sure it is lined up evenly.
Outline it in chalk.
Remove the blocks, mix mortar in a wheelbarrow and add mortar within your outline. Lay down your first layer of blocks, also mortaring between the ends of each block, and clean excess mortar from the edges. You’ll have to keep cleaning excess mortar as you go.
As you stack every few blocks, lay the level over the top of them and then tap them down with a rubber mallet until they are level. You will have to continue doing this throughout the process. SKIP THE MORTAR IF YOU ARE USING QUICKWALL ONLY.
Apply mortar to the next layer and lay the blocks in a staggered pattern. You can use what’s called a pointing trowel to clean up the lines of mortar between the blocks and scrape off excess.
Continue stacking like this until you have reached your desired height.
Fill holes with stones and then mix more regular concrete using the cement mixer or a wheelbarrow and pour it in all the holes.
Clean all of your tools and let it dry for a day.
Mix Quickwall in the wheelbarrow, wet the walls, and then scoop the mix onto a plastering trowel and then apply it to the wall scraping upward from the bottom. Continue doing this and smoothing it out with the trowel until you have covered all sides of the base.
Preparing the countertop
At this point, the best thing to do is pour a concrete countertop the same way you poured the slab. Check out several YouTube videos like this one.
Build a frame to fit over the base as you did for the slab.
Secure with long posts nailed into the exterior of the frame that reach to the ground.
Cut plywood to fit between the base supports. In my case, those would need to be 32 x 32 inches.
Prop them up with anything, as long as it keeps them flat: sawhorses, wooden poles or logs (I saw that a lot in videos) or more cinderblocks.
Add wire mesh, just like you did for the slab.
Mix and pour concrete. You’re an expert by now.
Smooth it out with the long 2x4, and then with the trowel, as you did with the slab.
Likewise, keep it moist, not wet, and let it cure for a few weeks.
Remove the frame.
(I found limestone slabs on clearance that fit my grill to the inch, so I was able to skip pouring a countertop. The problem for me is that limestone can crack under intense heat. I asked several masons, and most said it will be fine with a layer of firebrick.)
Preparing the cook space and counter space
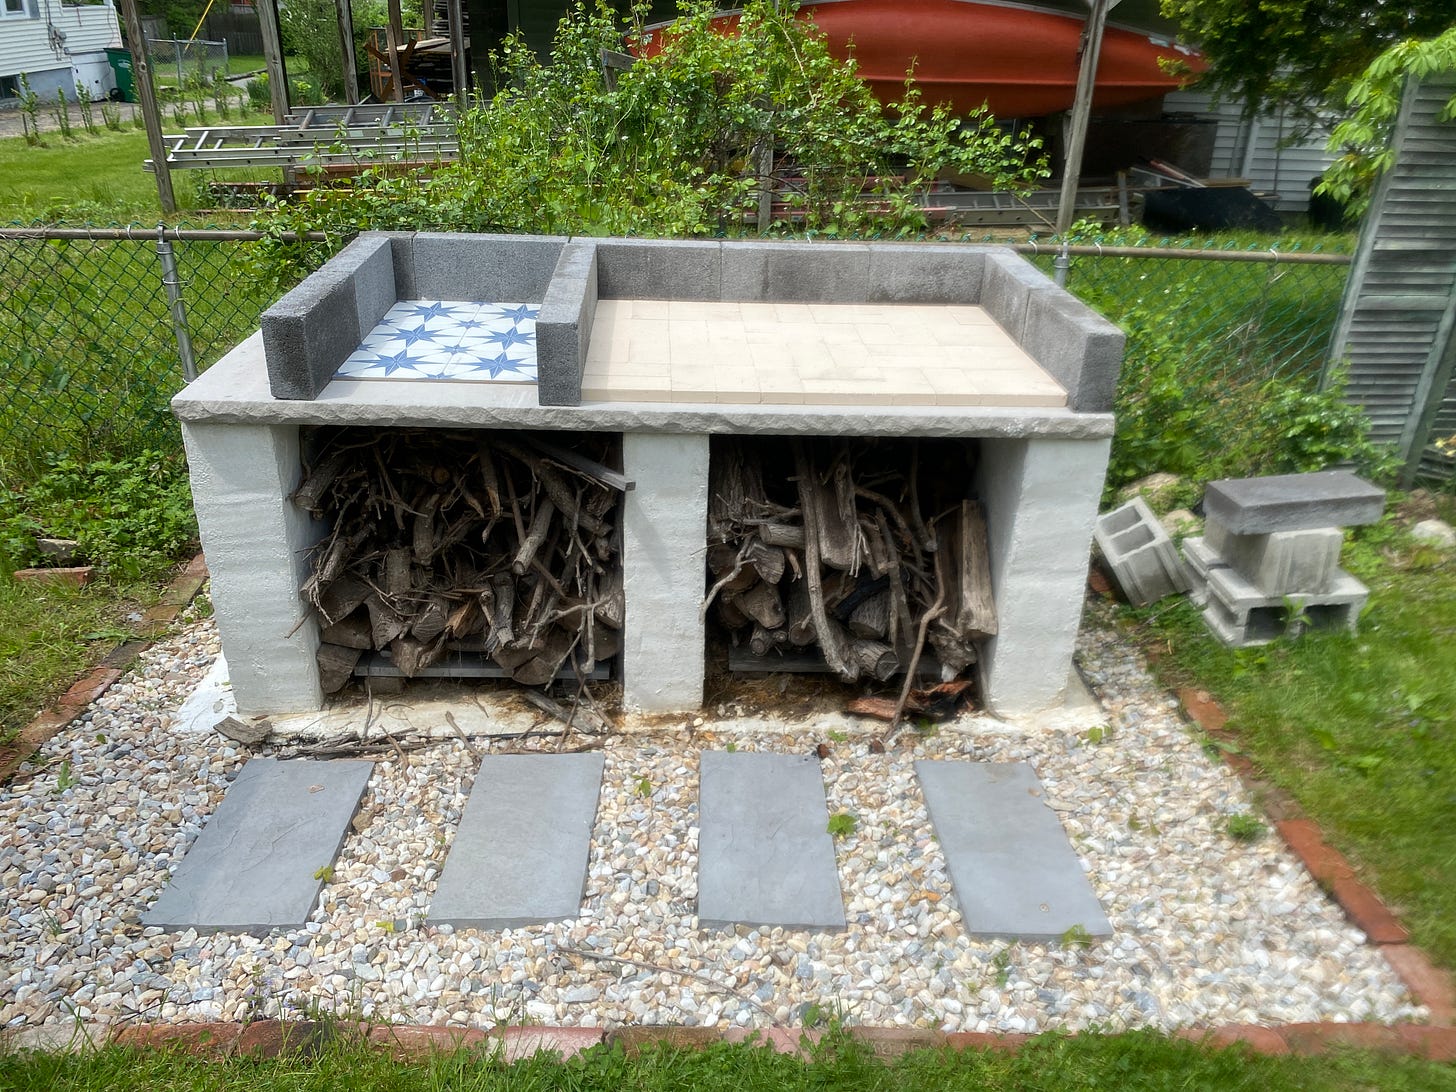
I laid the limestone slabs without mortar (they are extremely heavy, so they don’t need it anyway). I made a backsplash out of 2 x 8 x 16-inch solid blocks without mortaring them. Within the backsplash, I fit the firebrick, also without mortar. A high heat mortar would provide extra insulation here, but by dry-laying, if it cracks, it will be easy to disassemble. If that happens, I’ll pour a concrete countertop and build up the structure the rest of the way, Uruguayan style, with a roof and a chimney.
If you are worried about cracking, do what I did and dry-lay a backsplash on three sides with 2 x 8 x 16-inch solid blocks. I made mine about 40” wide and left the rest of the top as a counter space. If you aren’t worried about cracking, and you are confident that you won’t want to change anything, then decide how much cook space vs. counter space you want and build a backsplash around the cook space, about 32” high on three sides, mortaring the blocks, THIS TIME WITH HIGH HEAT MORTAR, and leveling as described in the “Stacking the base” section.
Line the cook space with firebrick. I used a pattern called a double basketweave—you make a square by laying two vertical and two horizontal. Again, if you are sure you want it to be permanent, mortar the firebrick with a high heat mortar. If not, just dry lay it. I have cooked with a raging fire on mine about a dozen times and there are no signs of problems.
Outfitting the cook space
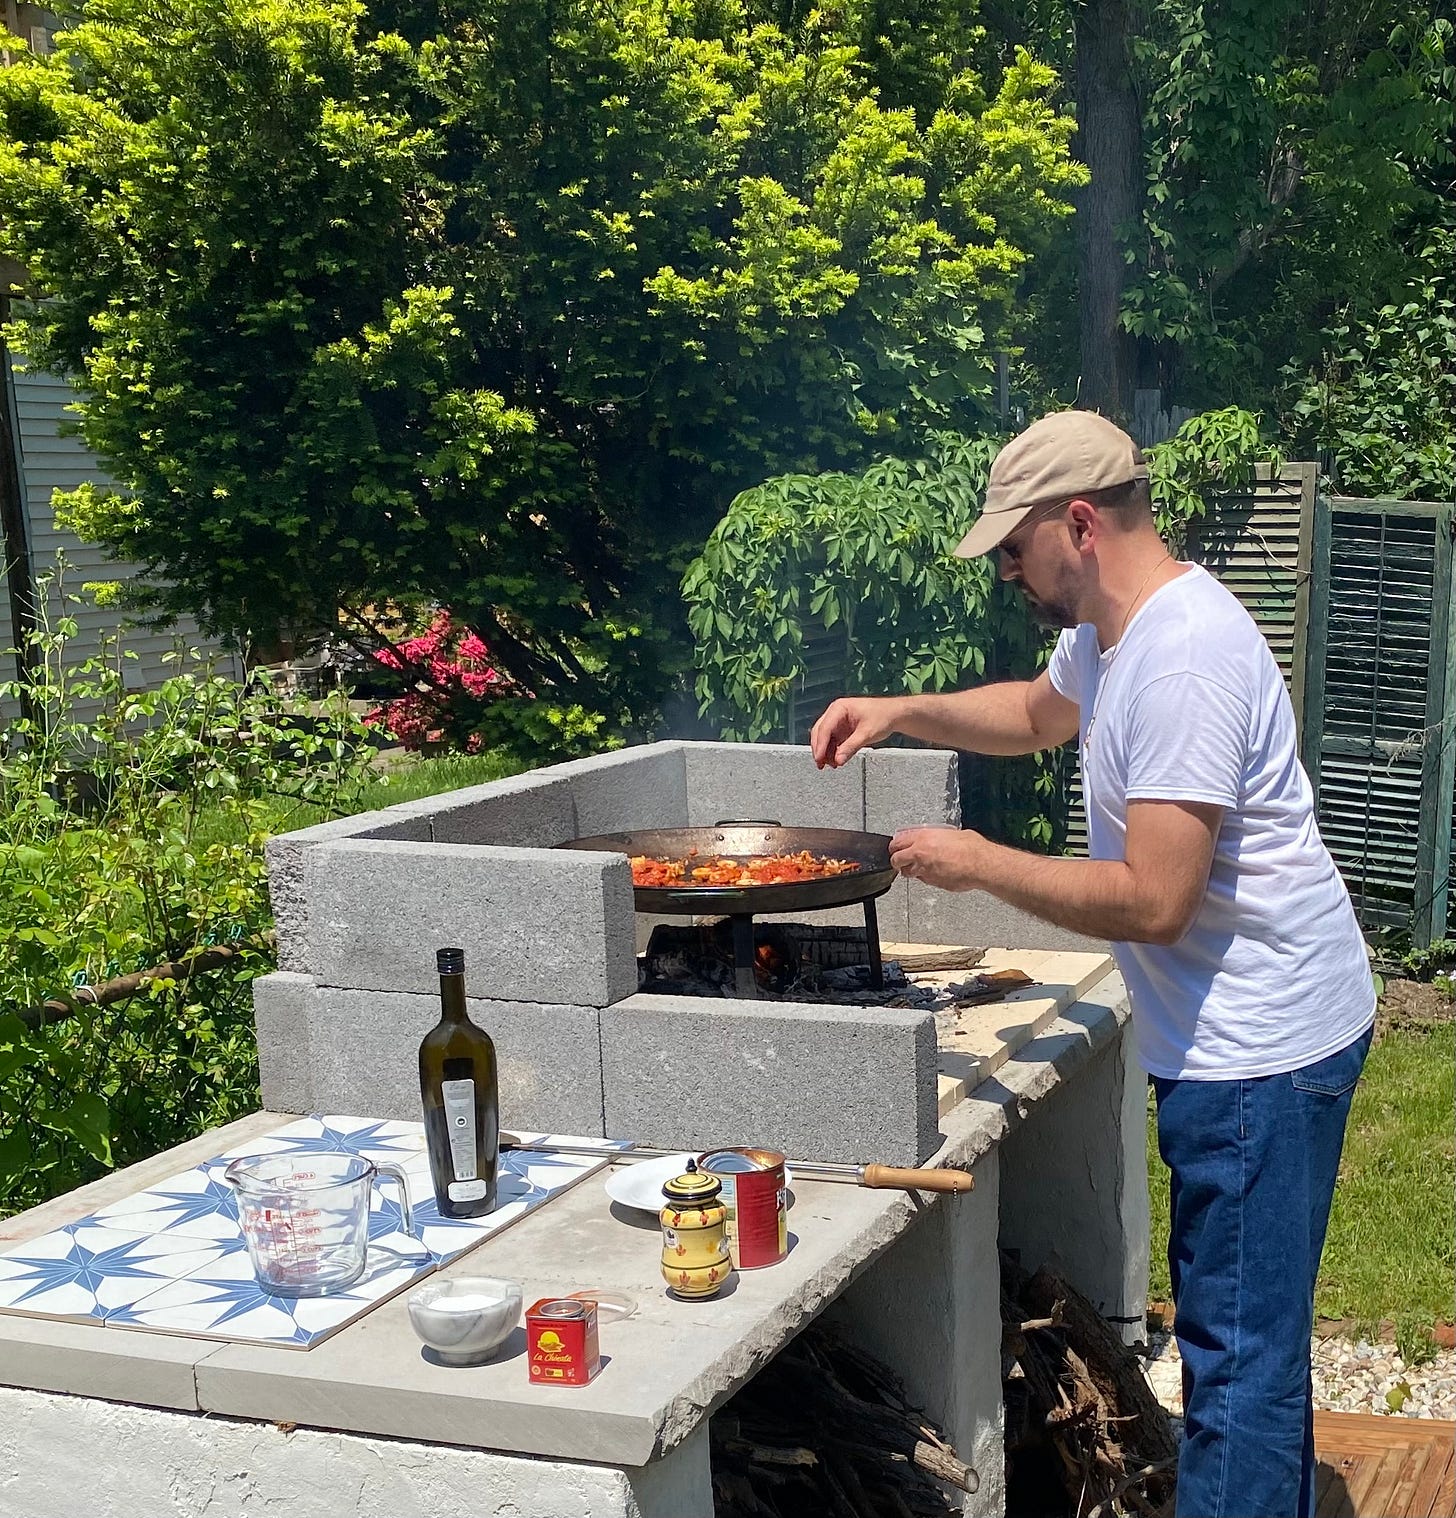
You could install a semi-permanent Argentine-style grill that you can raise and lower—I may or may not have one coming from Mexico (long story)—but it is almost better to use a simple stainless steel grill with four legs that fits your cook space. I like to easily swap between one of those and a paella ring.
On the counter side, I placed leftover Mediterranean-looking tiles from a bathroom renovation. Again, I didn’t cement them down, but that gives me the freedom to move things around as needed.
The surrounding area
I dug a few inches down in a big square around my grill, laid down weed block, bordered it with stray bricks my neighbor had, and then filled it in with river rock and stepping stones. I live on a hill, and I was worried that rainwater would drain into the wood storage area if I didn’t do something like this. So far, my wood hasn’t gotten wet.
I am confident that anyone with a few good vertebrae, who wants to do this, can. I have zero masonry skills, and I got through it, even with a pesky herniated disc; I love the way it came out. If you want to discuss your project or how to cook on it once it’s done, find me in the comments.





In the mid-1950s my father, uncle and grandfather built a smaller version of this at our summer cottage in NH. We gathered wood for the fire and cooked meat on a grill on top of the cement blocks and cooked marshmallow on sticks. I think that my father and uncle learned the fire-making skills as Boy Scouts.
Beautiful!